
Ever looked at other players’ buses in Bus Simulator Indonesia and wondered, “How did they get that cool-looking ride?”
The secret is mods and installing them is way easier than you think.
Whether you want a fancy new bus, realistic engine sounds, or even off-road maps, this guide will walk you through everything step-by-step. No confusing jargon, no tech headaches just plain and simple instructions.
Wait, What Exactly Are BUSSID Mods?
Think of mods like custom add-ons for your game. They let you add stuff that isn’t originally in BUSSID such as :
- New vehicles – Buses, trucks, cars, even off-road jeeps
- Cool paint jobs – Custom skins and liveries to make your bus stand out
- Realistic sounds – Engine roars, horn noises, and even music system effects
- New routes and maps – Extra driving areas beyond the default ones
- Strobe lights – Fancy lighting effects for that VIP look
What You’ll Need Before Installing
Before we jump in, let’s make sure your phone is ready:
✔ BUSSID installed – Get it from the Google Play Store if you haven’t already
✔ Some free storage space – Mods can take up a little room, so clear some space if needed
✔ Patience – It only takes 5 minutes, I promise!
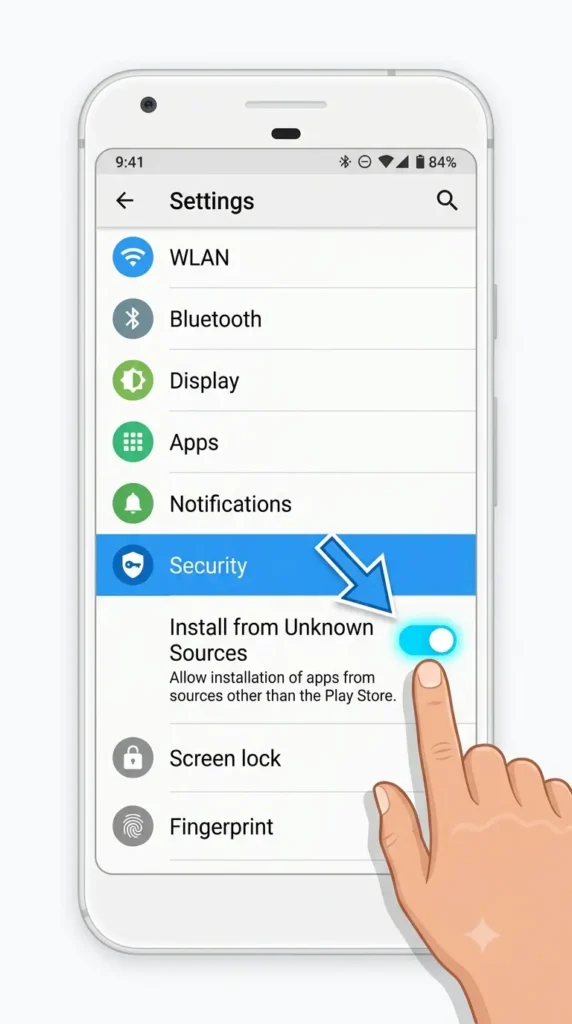
Step 1: Enable Installation from Unknown Sources
This sounds scarier than it actually is. Here’s what to do:
- Open your phone’s Settings
- Tap on Security or Privacy (depending on your phone model)
- Find and toggle on Install from Unknown Sources for your file manager or browser
Don’t worry – this just allows you to install files outside the Play Store. You can turn it off later if you want.
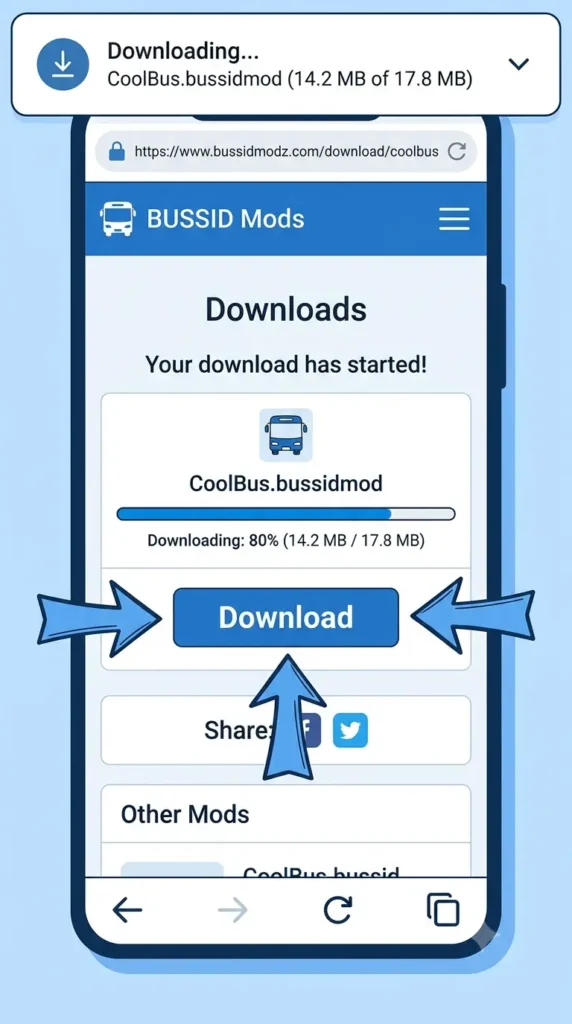
Step 2: Download Your Mod
This is where the fun begins!
You can find BUSSID mods on:
- Modding apps (like BUSSID Mods apps on Play Store)
- Telegram or WhatsApp groups
- Trusted mod websites
Important tip : Always download from reliable sources. If a website looks shady or asks for too many permissions, skip it. Your phone’s safety comes first!
Mods usually come in these formats:
.bussidmod– Standard mod file.bussidvehicle– Vehicle-only mod.zipor.rar– Compressed files (you’ll need to extract these)
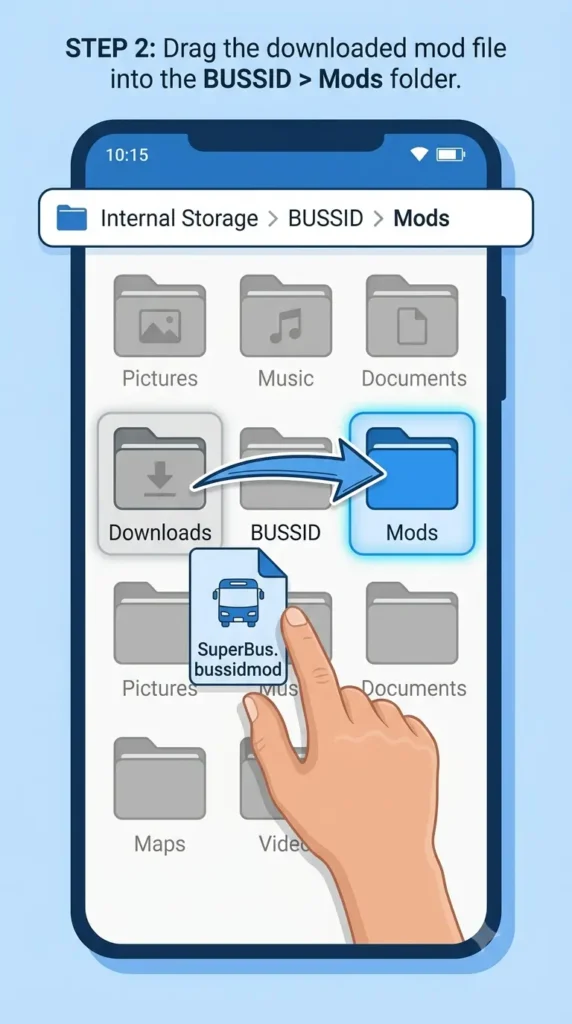
Step 3: Move the Mod File to the Right Place
Now comes the crucial part – putting the mod file where BUSSID can find it.
Option A: Using the BUSSID Mod Folder (Easiest Way)
- Open your File Manager app
- Go to Internal Storage > BUSSID > Mods
- If you don’t see a “Mods” folder, create one (just tap the + icon and name it “Mods”)
- Copy your downloaded mod file and paste it into this folder
That’s it!
Option B: If You Downloaded from Telegram or WhatsApp
- Open File Manager
- Go to your Downloads folder
- Find the mod file
- Move it to BUSSID > Mods folder
For .zip or .rar files: You’ll need to extract them first. Use apps like ZArchiver or RAR to unzip, then move the extracted mod file to the BUSSID folder.
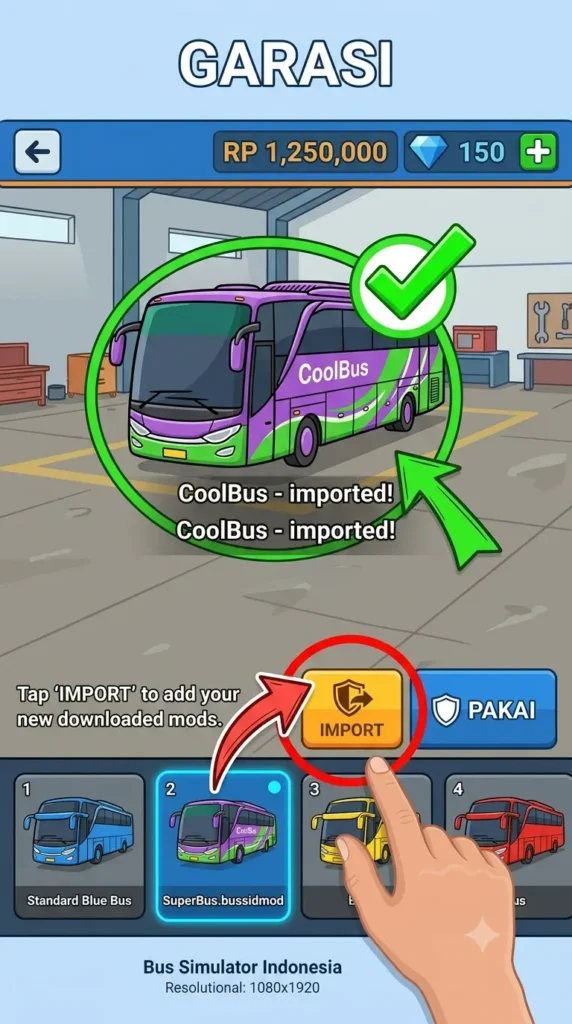
Step 4: Import the Mod in BUSSID
Now for the exciting part – loading it into the game!
- Open Bus Simulator Indonesia
- Tap on the Garage menu (that’s where all your vehicles live)
- Look for the Import or Mods button
- Navigate to the Mods folder you just used
- Select your mod file and confirm
🎉 Done! The mod should now appear in your garage.
Tap “Use” or “Pakai”, and your new ride is ready to go!
Step 5: Test Your New Mod
Start a game and take your new vehicle for a spin.
Can’t see the mod? No problem – here’s what to check:
✔ Did you place the file in the correct folder?
✔ Is the file format supported (.bussidmod or .bussidvehicle)?
✔ Try restarting the game
✔ Make sure your BUSSID version is up to date
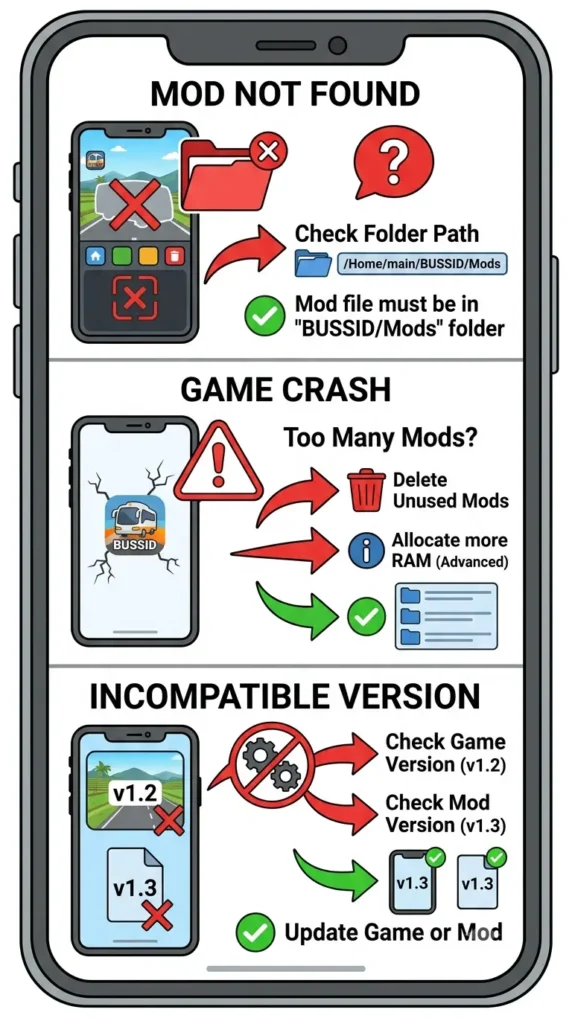
Common Problems & Quick Fixes
| Issue | Quick Solution |
|---|---|
| Mod not showing in garage | Double-check the file is in BUSSID > Mods folder |
| Game crashes after installing | The mod might be incompatible – try a different one |
| Can’t find the Mods folder | Create it yourself! Just name it “Mods” |
| Downloaded .zip file | Extract it first using ZArchiver or similar app |
Safety Tips You Should Know
Let’s be real – mods are created by fans, not the official BUSSID team. So keep these in mind:
🔒 Download wisely – Stick to trusted communities and sources
🔒 Avoid APK mods – Some mods come as separate apps. These can be risky, so proceed with caution
🔒 Respect copyrights – Mods use third-party content, so they’re not officially affiliated with BUSSID
🔒 Don’t overdo it – Installing too many mods can slow down your phone
Where to Find Good BUSSID Mods
Not sure where to start? Here are some popular and safe options:
- BUSSID Mods apps – Available on Google Play Store (check reviews first!)
- YouTube tutorials – Many creators share download links in video descriptions
- Telegram groups – Search for BUSSID mod communities
- Facebook groups – Active communities share mods daily
Always look for mods with good ratings and positive comments. If others are happy, you probably will be too!
Quick Recap (In Case You Got Lost)
- Download the mod file (stick to trusted sources)
- Move it to
Internal Storage > BUSSID > Mods - Open BUSSID, go to Garage, and tap Import
- Select your mod and confirm
- Enjoy your new ride!
Final Words
Modding BUSSID is one of the best ways to keep the game fresh and exciting. Whether you’re a bus enthusiast or just love customizing things, adding mods opens up a whole new world of possibilities.
And honestly? It’s super satisfying when you finally see that custom bus you downloaded rolling down the street. Trust me it never gets old.
So go ahead, download that cool mod, and hit the road. Just remember to drive safely (even if it’s just a game)!
1 thought on “How to Install BUSSID Mods on Android”
Comments are closed.